
Diamond Painting Blog
Does Diamond Painting Wax Dry Out? (And How to Fix It Fast)

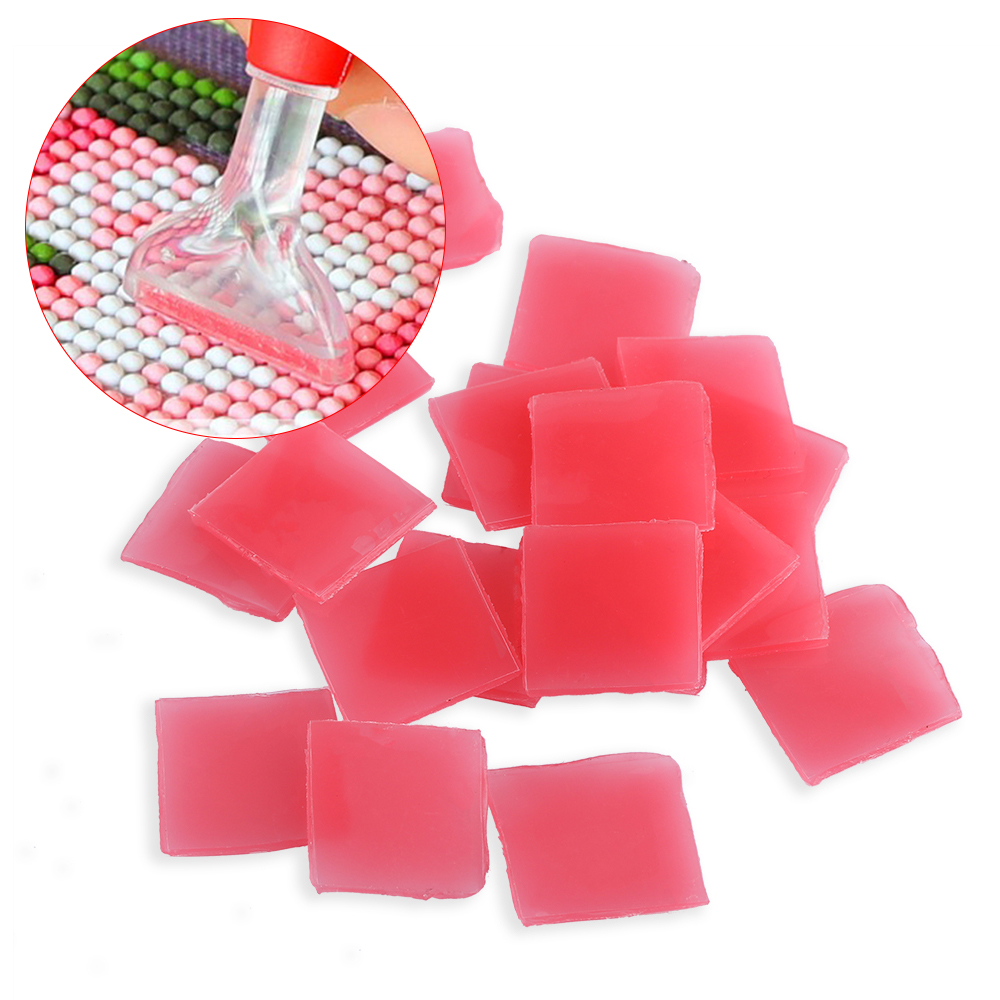
You're settled in for a relaxing diamond painting session, your favorite music is playing, and you're ready to place those sparkling drills. But when you press your applicator pen into the wax, nothing happens. It's hard, crumbly, and won't pick up any diamonds.
If this sounds familiar, you're not alone. The question "Does diamond painting wax dry out?" is a common concern among crafters. The answer is yes, diamond painting wax will dry out over time. But here's the good news: in most cases, it's fixable, and with a few simple habits, you can prevent it.
This comprehensive guide covers everything you need to know—from why wax dries out and how to recognize the signs to step-by-step revival methods, storage tips, alternatives, and product recommendations.
📍 How to Recognize Dried-Out Wax
Before you throw away what you think is a useless wax pad, take a closer look. Dried‑out wax displays very specific characteristics:
| Signs of Dried-Out Wax | What It Means |
|---|---|
| Hard, brittle texture | Wax has lost its original pliability |
| Crumbly or flaky surface | Wax is disintegrating instead of adhering |
| Difficulty picking up drills | Loss of adhesive tackiness |
| Wax cracking when pressed | Structural breakdown |
| Drills falling off the pen | Zero adhesion remains |
When wax loses its soft, slightly tacky quality, its ability to adhere to diamond drills diminishes, leading to frustration and slowdowns in your crafting. If your wax is flaky, crumbly, or won't hold drills, it's probably dried out.
🔍 Common Misconceptions About Diamond Painting Wax
Let's clear up a few common misunderstandings right away:
Myth #1: All wax is the same.
False. Diamond painting wax is specially formulated for this craft. It has a specific consistency and tackiness designed to pick up resin diamonds without leaving permanent residue. Regular candle wax or household waxes won't work—they're too hard, leave oily stains, and can damage your canvas.
Myth #2: You can melt dried wax to restore it.
Not recommended. Diamond painting wax isn't like traditional wax; it can't be melted or reused. Melting can change its chemical structure, making it too runny or ineffective.
Myth #3: Wax lasts forever if you don't use it.
Unfortunately, no. Even unused wax will eventually dry out from air exposure and natural curing.
🧪 Why Does Diamond Painting Wax Dry Out?
Understanding the science behind why wax dries out is the first step to preventing it. Several factors contribute:
1. Exposure to Air (The #1 Culprit)
Air is the biggest enemy of diamond painting wax. When wax sits exposed to oxygen, the volatile components that keep it soft and tacky gradually evaporate. This hardening process—also called curing—happens naturally over time. Leave your wax pad uncovered for too long, and it will dry out significantly faster.
2. Environmental Temperature
Extreme temperatures, whether hot or cold, can seriously impact your wax's consistency. Heat accelerates evaporation of moisture and softening agents, while cold can make wax crack and become brittle.
3. Sunlight and UV Exposure
Direct sunlight is damaging. UV rays break down the wax's molecular structure, causing it to harden and lose tackiness faster than in the dark.
4. Extended Usage
Even under ideal storage, wax hardens with repeated use. Each time you dip your pen and pick up a diamond, tiny wax particles transfer, making the remaining wax more compacted and less sticky.
5. Contamination (Dust, Dirt, and Pet Hair)
If you leave wax exposed, it not only dries out but also picks up dust, lint, and pet fur, which reduce its stickiness.
🛠️ How to Fix Dried-Out Diamond Painting Wax (Step by Step)
Don't despair. In most cases, dried-out wax can be revived with simple techniques. Try these methods from least to most aggressive.
Method 1: The Kneading Technique (For Mildly Dried Wax)
Best for: Wax that's slightly hard but not completely brittle.
-
Step 1: Wash and dry your hands thoroughly to remove any oils or dirt.
-
Step 2: Remove the wax from its container and place it between your fingers.
-
Step 3: Gently knead and roll the wax for 1–2 minutes. The warmth from your fingers will soften it.
-
Step 4: If it's still too hard, continue kneading. For seriously dried wax, you may need up to 5 minutes.
Pro Tip: If your wax comes from a brand like Diamond Dotz, kneading it with clean, warm fingers for about 30 seconds is often enough to restore softness.
Method 2: The Body Heat Trick (For Moderately Dried Wax)
Best for: Wax that's hard but hasn't yet started crumbling.
-
Step 1: Place the wax piece in the palm of your hand.
-
Step 2: Close your hand around it and hold for 2–3 minutes. Your natural body heat will transfer to the wax.
-
Step 3: Once warmed, remove and knead as described above.
Method 3: The Warm Air Method (For Stubbornly Hard Wax)
Best for: Wax that's been sitting unused for months or years.
Using a Hair Dryer (Recommended):
-
Step 1: Set your hair dryer to its lowest heat setting.
-
Step 2: Hold it at least 6–8 inches (15–20 cm) away from the wax.
-
Step 3: Apply warm air for only 5–10 seconds.
-
Step 4: Check the wax; if it's still hard, repeat once more.
-
Step 5: Once slightly softened, knead by hand to finish.
⚠️ WARNING: Never hold the hair dryer too close or apply heat for more than 15 seconds at a time. You want to warm the wax, not melt it. Melted wax can become too runny to use and may permanently lose its adhesive properties.
Alternative Heat Sources:
-
Place thePlace the wax on a warm, not hot, windowsill in indirect sunlight for a few minutes.ear a warm air vent for 2–3 minutes.
-
Put it in a pocket for 10–15 minutes to let body heat do the work passively.
Method 4: Microwaving (Last Resort – Use with Extreme Caution)
Best for: Wax that is completely rock‑hard and unresponsive to other methods.
-
Step 1: Place the wax on a microwave‑safe plate.
-
Step 2: Microwave on the lowest power setting for 2–3 seconds.
-
Step 3: Check immediately. If not softened, try one more 2‑second burst.
-
Step 4: Once slightly warm, knead immediately by hand.
🔴 CRITICAL: Never microwave for more than 5 seconds total. Diamond painting wax can melt rapidly and become unusable. Many experienced crafters advise against microwaving altogether and suggest sticking to hand‑kneading and body heat methods instead.
Method 5: When to Give Up and Replace
Some wax is too far gone to save. If you've tried all the methods above and your wax remains hard, crumbly, or fails to pick up diamonds after kneading, it's time to let it go. The good news? Replacement wax is inexpensive and widely available.
🛡️ How to Prevent Wax from Drying Out
An ounce of prevention is worth a pound of cure, especially for diamond painting wax. Follow these storage and usage habits to keep your wax soft, tacky, and ready.
1. Store in an Airtight Container
The main reason wax hardens is exposure to air. Always keep your wax in a sealed container when not in use. Options include:
-
The original wax container that came with your kit (most brands include one)
-
A small plastic zip‑lock bag
-
A pill organizer
-
A dedicated diamond painting storage box
Pro Tip: If your wax came with a plastic cover, don’t throw it away. Using the original plastic cover helps extend the life of your wax.
2. Keep It Cool and Dark
Store your wax in a cool, dry place away from direct sunlight. Avoid:
-
Hot attics or garages
-
Near radiators or heating vents
-
Sunny windowsills
-
Cars (extreme temperature fluctuations)
3. Avoid Excessive Handling
Natural oils from your fingers can transfer onto the wax, making it less effective over time. When loading your pen, use quick, clean movements rather than rolling the wax between your fingers.
4. Don't Overload Your Pen
Using too much wax in your pen can cause it to dry out faster and make it difficult to work with. Load only enough wax to fill the pen tip without overflowing. If you add too much, scrape off the excess with your fingernail or tissue.
5. Seal the Container After Every Use
It sounds obvious, but many crafters forget. Every time you finish a session, make sure the wax container is fully sealed before putting it away.
🔄 Diamond Painting Wax vs. Alternatives
Traditional pink wax isn't your only option. Several alternatives offer different benefits, including longer-lasting adhesion and less mess.
| Option | Pros | Cons | Best For |
|---|---|---|---|
| Traditional Pink Wax | Included with kits, easy to use, beginner‑friendly | Dries out relatively quickly, needs frequent replacement | Beginners, small projects |
| Adhesive Putty | Long‑lasting, reusable, leaves no residue, stays tacky | More expensive upfront, requires a learning curve | Large projects, frequent crafters |
| Diamond Painting Glue | Very strong adhesion | Can leave residue, not reusable | AB diamonds (special reflective drills) |
| Blue Tack / Poster Tack | Inexpensive, widely available, reusable | May leave slight residue, needs kneading before each use | Emergencies, budget crafters |
| Modeling Clay | Easy to find, non‑toxic | Less effective than dedicated wax, temporary solution | Absolute emergencies only |
Quick Comparison: Putty vs. Traditional Wax
| Feature | Traditional Wax | Adhesive Putty |
|---|---|---|
| Longevity | Short (needs replacement every 1‑2 hours of use) | Long (hours or even days of continuous use) |
| Residue on diamonds | Can leave slight film | Minimal to none |
| Ease of use for beginners | Very easy | Moderate learning curve |
| Cost per use | Low (but needs frequent replacement) | Higher upfront, lower over time |
| Storage sensitivity | High (dries out quickly) | Low (stays tacky longer) |
If you're working on a large, complex piece, many experienced diamond painters prefer putty because it provides stable, long-lasting adhesion and reduces interruptions for wax changes.
❌ What NOT to Use as Wax
Candle wax is not a suitable substitute. Here's why:
-
Wrong consistency: Candle wax is designed to burn, not stick. It lacks the tackiness needed to pick up diamonds.
-
Contains additives: Fragrances, dyes, and other additives can stain your canvas and dull your diamonds.
-
Safety concerns: Candle wax can melt excessively when heated, potentially releasing harmful fumes.
Other unsuitable alternatives include: white glue (dries too hard), toothpaste (will damage canvas), and lip balm (too oily and messy).
🛒 Recommended Wax Products
After reviewing popular options, here are the top picks for keeping your diamond painting sessions smooth and frustration‑free:
| Product | Key Features | Best For |
|---|---|---|
| ARTDOT Enduring Stickiness Putty Wax | Long‑lasting stickiness, no frequent replacements, slide storage box included | Large projects, value‑seeking crafters |
| Benote Diamond Art Painting Pen (with refillable wax) | Self‑stick rotating design, ergonomic metal body, correction plate included | Crafters wanting an all‑in‑one tool |
| Diamond Dotz Wax | Brand trusted worldwide, keeps well in sealed pot, one pot lasts multiple projects | Beginners and casual crafters |
| 10‑Piece Diamond Art Glue and Wax Set | Multiple storage cases, strong viscosity, durable packaging | High‑volume crafters, gift‑giving |
❓ Frequently Asked Questions
How long does diamond painting wax last?
With proper storage in an airtight container in a cool, dark place, wax can remain usable for several months or longer. However, once opened and exposed to air, most crafters replace wax after about 10–20 hours of active use. If you handle beads gently, you'll use less wax and replace it less often.
How often should I add wax to my pen?
You'll know it's time to add more wax when drills slip off the pen easily or when you can't lift a drill after multiple attempts. On average, most crafters refresh wax every 1–2 hours of active painting.
Can I use lip balm or petroleum jelly as a substitute for wax?
In an absolute pinch, a small amount of clear lip balm or petroleum jelly can work temporarily, as they have a similar texture. However, these are not recommended for regular use—they tend to leave oily residue on your canvas and diamonds and attract dust and lint.
Why is my wax not picking up diamonds even when it seems soft enough?
Several possibilities beyond dryness:
-
Forgot to peel off the protective film: Many wax pads come with a thin plastic film that must be removed before first use.
-
Too much wax in the pen: Overloading can actually make it harder to pick up cleanly.
-
Too little wax: The tip may not have enough adhesive surface.
-
Dirty pen tip: Oils from your fingers or dust on the tip can reduce adhesion.
Does finished diamond painting wax continue to dry out?
Once diamonds are placed on your canvas, the wax's job is done. The wax itself doesn't affect the longevity of your finished piece—what matters is the canvas adhesive. Store your finished diamond painting flat, covered with parchment paper, away from direct sunlight and humidity.
💎 Final Thoughts
Yes, diamond painting wax dries out. But with the knowledge from this guide, you can easily revive most dried wax in minutes—or better yet, prevent it from drying out with proper storage habits.
Whether you stick with traditional pink wax or upgrade to long-lasting putty, keeping your adhesive in good condition means more time enjoying the meditative joy of diamond painting and less time fighting your tools.
Remember the golden rules: Keep it sealed, keep it cool, and when in doubt—knead it out.
Happy crafting! ✨