
Diamond Painting Blog
How to Create Custom Diamond Paintings: Turn Your Photos into Sparkling Art

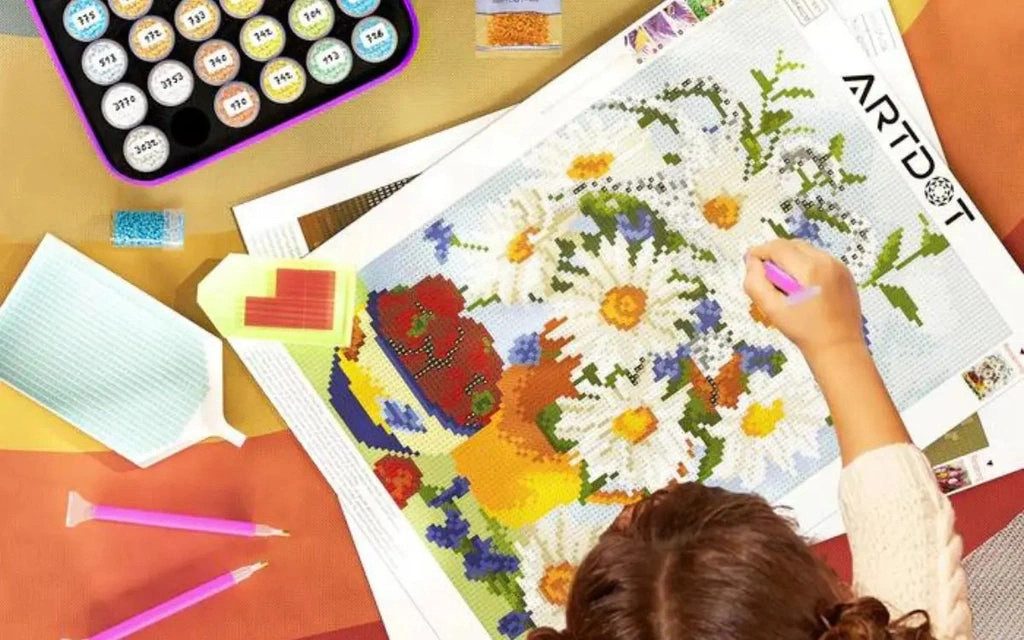
Ready to turn your precious memories into striking works of art? Custom diamond painting starts at just $59.99. This craft has spread worldwide with more than 26,000 diamond art kits delivered to happy customers.
These custom paintings have earned 4.3 out of 5 stars from over 9,500 reviews. They let you recreate your photos using tiny, sparkling resin pieces uniquely. The process needs attention to detail but remains straightforward, making it perfect for both personal projects and thoughtful gifts.
This piece guides you through creating your own custom diamond painting from a photo. You'll learn everything from picking the right image to ordering your kit. Expert tips will help ensure your custom diamond art captures those special moments beautifully. Our step-by-step tutorial shows you exactly how to create diamond paintings that bring your memories to life.
Step 1: Upload Your Photo
The success of your custom diamond painting starts with picking the right photograph. Your chosen image will determine the final quality, clarity, and how your sparkling creation turns out. Let's see how to pick the perfect photo for your diamond art masterpiece.
Choose a high-resolution image.
Quality substantially matters when creating individual-specific diamond paintings. Diamond art converts your image into tiny 2.7mm drills, and medium-sized canvases have about 30,000–70,000 individual pieces. Your original photo must be clear enough to handle this transformation process.
Here's what to look for in an image for your custom diamond painting kit:
- Use high-resolution photos (ideally 300 DPI or higher)
- Pick the original file from your camera roll—not screenshots or social media downloads.s
- Stay away from small, pixelated images that won't work well on canvas
- Pick well-lit photos that show vibrant colors and clear details
Note that larger digital files create clearer, more vibrant images. Small photos, especially screenshots and low-quality smartphone snapshots, often look blurry or pixelated in the finished product. Check your image at 100% zoom to get optimal results. If details like eyes, whiskers, or hairlines look soft or pixelated at full view, they'll appear dull on the finished canvas.
Avoid dark or blurry background.ds
Your photo's background is a vital part of creating stunning custom diamond art. Photos with busy or distracting backgrounds take away from the subject and make it hard to focus on what matters. This complexity can make the diamond painting process harder and less fun.
While perusing potential photos:
Look for strong contrast between colors and clear boundaries between different elements. Images with good contrast are a great way to get quality and enjoyment from your custom diamond painting experience. Plain backgrounds like walls, sky, grass, or subtly blurred settings work much better than patterned couches, wallpaper, or crowded rooms.
Good lighting makes all the difference. Skip photos taken in direct sunlight or dimly lit areas - they create unwanted shadows or graininess. Natural daylight offers ideal lighting conditions, while indoor yellow lighting warms everything up, and harsh flash photography flattens features. Soft window light works best for indoor shots, and you should avoid backlighting your subject.
Use pets, portraits, or landscapes.pes
Several subjects consistently create beautiful results in custom diamond painting. Pet portraits rank among the most popular choices—you can turn a photo of your beloved companion into a sparkling tribute. Dog portraits have become a favorite among many diamond painting enthusiasts.
Family portraits are another excellent option that preserves precious memories in a unique artistic medium. Landscape photos, especially those from favorite vacation spots with clear skies and distinct features, work exceptionally well in the diamond painting format.
Pick an image that holds special meaning or sentimental value. This personal connection makes the finished diamond painting even more meaningful. But if you're new to diamond painting, start with something simpler and smaller to get a feel for the craft before trying a complex custom option.
Always choose "Original Size" or "Full Resolution" when uploading your photo. Skip compressed versions that remove pixel detail - these compression processes destroy the micro-contrast and sharp edges that diamond drills need to create a vibrant, detailed image.
Step 2: Choose Canvas Size and Shape
Picking the right canvas size and shape for your custom diamond painting can make or break your artwork's quality. Your choice after uploading the photo will determine how clear and detailed your diamond masterpiece looks when finished.
How size affects detail and clarity
Canvas size and detail have a simple relationship - bigger canvases let you show more details. You might want to pick a smaller canvas to save time or money, but that could leave you with a blurry or pixelated result.
Custom diamond paintings look better on larger canvases. The more diamonds you use to create your image, the more realistic and detailed your finished painting becomes. This matters a lot if you're turning photos into diamond art and want to capture every detail.
Larger canvases are a must for detailed images like landscapes, complex patterns, or lifelike portraits. Simple designs with basic shapes, cartoon characters, or uncomplicated patterns work fine on smaller canvases.
The actual canvas comes slightly bigger than the image to leave room for framing. Your displayed piece will look a bit smaller than the size you ordered.
Square vs. rectangular formats
Your choice between square and rectangular formats depends on looks and practicality. Square formats give you that classic, framed look, while rectangular ones work better with landscapes or group photos.
Square drill kits create a seamless mosaic look without gaps between diamonds. These drills fit perfectly together, and many crafters love the complete coverage they provide. Expert crafters say square drills pack in more detail, though they take longer to place just right.
Round drills are faster and easier to work with, especially with multi-placers, but they won't give you the same detail as square ones. Quality really matters with square drills - low-quality ones can ruin your project, so stick to trusted companies.
Recommended sizes for portraits
Here's what size you need for photos with people:
- Single person portrait: At least 40x50cm (15.8"x19.7")
- Two people: At least 60x80cm (23.6"x31.5")
- Three or more people: At least 80x100cm (31.5"x39.4")
Most diamond painting fans love the 40x50 cm canvas size. It hits the sweet spot between easy handling and enough space for designs. This size works great for hobbyists and gives good detail without breaking the bank.
Let's look at a real example: A wedding photo on a 30x40cm canvas might seem fine, but faces will look fuzzy. Going up to 60x80cm lets you see crisp features and smooth color changes, making something worth displaying.
Your perfect canvas size depends on more than just the number of people:
- Background complexity (detailed scenes need bigger canvases)
- Number of colors (larger sizes show more color variety)
- Viewing distance (bigger pieces look better from far away)
New diamond painters should start with smaller projects (under 12"x12"). These take less time and help you learn the basics. As you get better, you can move up to bigger, more detailed projects.
Bigger canvases need more diamonds that must line up perfectly. The extra work pays off, though - you'll get better detail and visual impact, especially in custom pieces meant to last years.
Step 3: Select Diamond Shape
You've picked your photo and canvas size. Now comes another big decision - should you go with square or round diamonds for your diamond painting kit? This choice will shape your project's look and how easy it is to complete.
Square vs. round diamonds
These diamonds aren't just different in shape. Square ones are about 2.5mm across, while round ones are a bit bigger at 2.8mm. You'll need fewer round diamonds to fill the same canvas space.
The biggest difference shows up in how they cover the canvas. Square drills create a perfect mosaic with no gaps between them. Round drills leave tiny spaces where you can see the canvas peeking through.
Both types have many facets that catch the light, giving your painting that signature sparkle. Though they're made from the same resin, their shapes create different light effects - something to think over when planning your artwork.
Quality makes a huge difference here. Square drills that aren't uniform can ruin your whole project. The manufacturing consistency of square diamonds really affects how easily you can place them and how good the final piece looks.
Which is better for beginners?
Round diamonds are your best bet if you're new to diamond art. Most seasoned crafters point newcomers toward round drills. These are more forgiving and easier to place since you don't have to line them up perfectly.
Round diamonds give new crafters several advantages. You can place them any way you want, and slight misalignments won't show. The work goes faster,r too. Multi-placer tools let you put down several diamonds at once. This means less frustration while you're learning the ropes.
Square diamonds need much more precision. Each one must line up perfectly with the ones next to it, which takes more patience and attention. New crafters often struggle with this - any mistakes stand out right away.
Starting with round diamonds lets you enjoy creating your first piece without getting caught up in perfect placement. After finishing a round drill project, you might feel ready to take on the challenge of square diamonds.
How shape affectthe s final look
Your choice of shape really changes how your finished piece looks. Square diamonds give you complete coverage that many enthusiasts love for its polished look. The image looks more unified and detailed when every bit of canvas is covered.
Square drills usually show more detail and definition. Their smaller size and full coverage help capture fine details - this really matters for portraits or complex images.
Round diamonds create their own special sparkle. Their circular shape catches light differently from various angles, creating a twinkling effect. Many people love this look, especially in larger pieces viewed from far away.
Light bounces off these shapes in different ways. Square diamonds create uniform light patterns across your painting. Round diamonds can face any direction, so they create random sparkles as light hits their facets.
Your final choice might come down to personal style. Square diamonds work best if you want precision, detail, and full coverage. Round diamonds are great if you want to work faster and love that twinkling effect.
Both options create beautiful artwork - each with its own unique charm. Your choice depends on what looks best to you, how patient you are, and whether you care more about speed or precision.
Step 4: Preview and Place Your Order
Your final pre-order step after selecting your diamond type lets you preview your custom creation and place your order. This step will give a perfect match between your expectations and the final product before production starts.
Using live previews or mockups
The preview step is a vital part of ordering a custom diamond painting. Many good companies give you digital preview renders that show how your photo will look as a diamond painting pattern. You can review the clarity, color balance, and overall look before moving to production.
Some stores add a preview with your order automatically. Others need you to ask for one. To name just one example, vendors like Ever Moment on AliExpress let you see the rendered design. You can visualize your final product and make changes if needed.
The best preview results come from these strategies:
- Reach out to multiple companies to compare their render quality and prices
- Find stores that give free previews before purchase
- Watch facial features and important details in portraits closely
- Ask for changes if parts look unclear or wrong
Yes, preview services indeed differ between companies. Art DIY Studio, for example, states that "95% of support emails are answered within 12 hours" for render requests. The preview stage gives you a chance to approve your design before production begins, and your final custom diamond painting kit will match what you want.
Understanding production timelines
Making a custom diamond painting from a photo needs time. Companies usually take 3-4 weeks total for processing and shipping. This time covers canvas printing, diamond sorting, packaging, and delivery logistics.
Production usually follows this pattern:
- Original processing and design preparation: 6-8 days
- Manufacturing and assembly: 1-2 weeks
- International shipping: 9-14 business days for standard delivery
Different companies have different processing times. Dreamer Designs says custom kits ship from overseas factories in China and need 15-20 business days for creation and processing. Art DIY Studio works faster, saying that "every custom kit is made just for you" in 7-9 business days.
Check the company's production schedule before ordering. Planning helps if you need your kit by a specific date. Some companies even send updates during different manufacturing stages.
What to expect after ordering
Production starts right after you place your order. Knowing what happens next helps set the right expectations about your custom diamond art from a photo.
Many companies send your digital preview first (if not shown before purchase) to get your approval. Heartful Diamonds says they "work closely with you to make sure your memories turn into the perfect art piece. This shared approach leads to better results.
After you approve, production begins ,and you'll get tracking information when your kit ships. Your tracking link helps you watch your package's progress. Shipping times change based on where you live:
- USA, UK, Canada, Australia: 10-21 days
- Most other countries: 15-30 days
Note that your final artwork might look slightly different from the digital preview. Heartful Diamonds points out natural factors like color conversion limits (diamond kits use 30-60 bead shades), lighting effects, and dimensional qualities that screens can't show.
Your order starts an exciting process that turns your special photo into a sparkling work of art you'll soon have in your hands.
Understanding Diamond Types
The type of diamonds you choose for your custom diamond painting kit will make a huge difference in how your finished artwork looks and sparkles. You'll find several diamond options that help you create exactly the look you want.
Standard resin diamonds
Standard resin diamonds are the gold standard in diamond painting and are the foundation of most custom diamond art photo projects. These high-quality drills shine brilliantly and have polished, consistent shapes that give your artwork a professional look. They're made from durable resin materials that keep their clarity and uniformity throughout your project.
Resin diamonds stick better to adhesive canvases. This quality helps you avoid the biggest problem of "popping drills" that you often see with cheaper materials. These drills give you gallery-quality results that you'll want to display, especially when you have detailed custom diamond paintings from photos.
You can get these diamonds in over 400 DMC-matched colors. This range lets you capture all the subtle tones and shades in your photographs. A bag costs between $1-5 USD and contains 200-2000 drills, making them accessible to more people and the most popular choice for personalized diamond paintings.
Aurora Borealis (AB) diamonds
Aurora Borealis (AB) diamonds add magic to your custom diamond art from pa hoto. Named after the northern lights, these special drills have an iridescent coating that creates beautiful rainbow shimmer effects and adds depth to your creation.
AB diamonds are great at creating focal points in your personalized diamond painting. You can place them strategically to make specific areas stand out without overwhelming the design:
- They're perfect for stars, reflections, or shimmering elements
- They work great with water, glass, or metallic objects
- You can use them to emphasize important details subtly
Professional designers don't use too much of AB diamonds because their vivid shimmer can overpower subtle areas. Think of them as jewelry for your custom diamond painting—a little bit raises your artwork's visual impact significantly. They cost a bit more than standard resin drills ($2-10 USD per bag), but the dramatic effect makes them worth it.
Glow-in-the-dark and crystal options
Glow-in-the-dark options can make your custom diamond paintings truly special. These unique drills soak up light during daytime and give off a soft, magical glow in the dark. They work great for nighttime scenes or adding hidden surprises to your artwork.
These luminous diamonds look like jelly and come in about 20 different colors. They need about five minutes of strong light exposure to activate their glow. The more light they get, the stronger and more dramatic their glow becomes.
Crystal diamonds offer another premium choice to make your custom diamond painting projects exceptional. These glass-like drills sparkle like real diamonds or Swarovski crystals. While most kits don't include them as standard, you can find specialized vendors like Crystal Canvas that sell diamond art kits with all-crystal drills for maximum brilliance.
Some manufacturers have started including crystal elements in their charting for diamond painting enthusiasts who want the best quality and visual impact. Diamond Art Club now includes "Iridescent" crystal drills in some kits. Other companies offer special options like "Fairy Dust," "Electro," and various premium effects.
Whatever diamond types you pick for your personalized diamond painting, knowing these options helps you achieve the exact visual effect you want—from subtle elegance to dramatic sparkle.
What’s Inside a Custom Diamond Painting Kit
A custom diamond painting kit has all you need to turn your photo into a dazzling piece of art. The kit comes with everything to finish your project successfully.
Canvas and adhesive
The printed canvas forms the base of your custom diamond painting from a photo. It has a sturdy cloth backing with a printed image under an adhesive layer. Small coded sections on the sticky surface match specific diamond colors.
Quality manufacturers use poured glue to make custom diamond art from photo projects. This method creates a thick adhesive that stays sticky for months while you work on your project. A clear plastic film protects the canvas, which you can peel back as you progress.
Quality canvases show clear symbols or numbers that tell you where each diamond belongs. The best kits offer full-drill designs. Diamonds cover the whole image area and create a beautiful mosaic effect upon completion.
Drills and a color-coded chart
Your personalized kit has all the "drills" (small resin diamonds) to complete your design. Small labeled bags hold these drills and arrange them by DMC color codes - the same system cross-stitch embroidery uses.
A medium-sized custom diamond painting kit usually has 20-45 different colors. Complex or larger images might need more color variations. The color-coded chart acts as your guide and shows:
- Each color's symbol or number
- DMC color code matches
- Number of diamonds needed per color
- Real diamond color samples
This chart helps you stay on track and quickly find where diamonds belong on your canvas.
Tools: pen, tray, wax, tweezers
The kit provides special tools to place diamonds with precision:
The applicator pen helps you pick up and place diamonds. This hollow plastic tool holds wax or special gel that creates a sticky tip to lift individual drills.
The sorting tray (drill boat) gives you space to arrange your diamonds. Its ridged design helps diamonds line up with their faceted side up, making them easier to pick up.
A small wax or gel container keeps your applicator pen sticky enough to lift diamonds. Some premium kits come with different-sized applicator pens to help with various placement techniques.
Tweezers help you make precise adjustments and place diamonds in tight spots. You might also get extras like a comfort grip for your pen, a light pad to see better, or storage containers to keep your drills in order.
These tools combine smoothly to help you create your personalized diamond painting masterpiece.
How to Paint With Diamonds
Custom diamond painting needs patience and technique. Your personalized kit will help you turn tiny resin diamonds into a spectacular display of your cherished photo.
Step-by-step painting process
Start by unrolling your custom diamond painting canvas on a clean, flat surface. The protective film should be peeled back in small sections where you plan to work. This method keeps your adhesive fresh and dust-free.
The kit comes with a tray - pour a few diamonds of one color into it. Gentle shaking of the tray's ridged design positions diamonds facet-side up. The diamond pen needs to be pressed into the wax or putty supplied, which creates a sticky surface for picking up individual diamonds.
Each diamond should be picked up with the pen tip and placed on its matching symbol on the canvas. You can move to adjacent areas by peeling back more protective film while covering completed sections.
The pen needs a twist to get more putty whenever the diamonds stop sticking. Glue dots can work better than wax if you want longer-lasting stickiness.
Tips for organizing drills
Your custom diamond art experience becomes smoother with good organization. Most diamond painters prefer specialized containers with individual compartments over the small bags in kits.
The containers should match your canvas symbols or numbers. Here are some labeling options:
- Premium kits' sticker sheets
- Permanent markers directly on containers
- Painters' tape labels that peel off easily
- Erasable markers on reusable containers
Sorting all diamonds before you start makes a difference. This upfront work prevents interruptions later. Many crafters organize containers by number or color families to find pieces quickly.
Avoiding common mistakes
Rushing through custom diamond painting projects leads to the most mistakes. Each diamond deserves careful placement - this craft should be relaxing.
Heavy books placed on your canvas for 24-48 hours help it stay flat. Rolling it opposite to the curl before adding weights can fix stubborn curling.
A light pad under your canvas makes symbols more visible, which reduces eye strain and misplaced diamonds. Straight rows come easily with a ruler or credit card as your guide.
Diamonds need gentle pressure during placement to protect the ones already set. A lint roller quickly picks up scattered diamonds after spills.
Your completed custom diamond painting should be cleaned well before sealing. Tweezers help remove stray fibers or hairs that could affect the final look.
Finishing and Displaying Your Artwork
Your completed diamond painting deserves proper preservation and display that will make your work shine for years.
How to seal your painting
You don't always need to seal your work, especially with high-quality kits or pieces behind glass. Exposed displays or lower-quality kits with "popping drills" will benefit from sealing to protect and extend their life. Minwax Polycrylic Clear Gloss remains the best choice, as it works better than options like Mod Podge that yellow over time.
The best way to prepare for sealing starts with securing loose drills. Use a heat gun or hairdryer on high heat, then roll gently with a soft rubber brayer. The sealer should be applied in light, even coats from about 12 inches away from the canvas.
Framing options
Standard photo frames work beautifully to showcase your custom diamond art. Oddly-sized paintings have several options:
- Poster frames (under $25 at Walmart or Target)
- Stretcher bars that create a professional, three-dimensional effect
- Foam board mounting that gives a flat, borderless finish
Professional framing at craft stores will give the best results, though it costs more. Look for coupons with 20-70% discounts to save money.
Creative display ideas
Your custom diamond painting can become a gallery-wrapped canvas when attached to a pre-stretched blank canvas. Just use spray adhesive on both surfaces. Another option creates a hanging tapestry with wooden poles and fabric glue for vertical displays.
Your chosen display method must secure the painting well. Diamond paintings weigh quite a bit and can shift inside frames without proper adhesion.
Conclusion
Custom diamond painting turns cherished memories into impressive works of art that sparkle with personality. This piece explores each significant step—from selecting high-quality photographs to choosing the right canvas size and diamond shape for your unique project.
The beauty of custom diamond painting lies in its accessibility. Anyone can create stunning, tailored artwork, whatever their artistic experience. The process needs patience, and the meditative quality of placing each tiny diamond creates a relaxing experience that many crafters find deeply satisfying.
Quality matters at every stage. Clear, well-lit photographs will give your final piece the important details you want to capture. The right canvas dimensions let your image shine with proper clarity and definition. Square diamonds provide precision and complete coverage, while round diamonds are easier to apply and create distinctive sparkle.
Your finished diamond painting becomes a meaningful keepsake that uniquely preserves special moments. The care you invest directly shapes the beauty of your final creation, so take time with each step—from organizing your drills to sealing and framing your masterpiece.
Custom diamond painting gives you a hands-on way to celebrate life's precious moments. These sparkling creations bring joy both during creation and as displayed art for years to come. Pick your favorite photo today and watch it transform into an impressive treasure you'll proudly display.